Tuesday, 24 January 2012

Craft For Kids. How To Make A Chinese Dragon Puppet {Tutorial}

To celebrate the start of the Chinese New Year, which is the year of the dragon I will be making dragon puppets with the children at art club today. This tutorial will demonstrate how to make a relativity easy but effective looking puppet.
You will need:
2 x toilet roll tubes
scissors, glue & tape
black and white card
paper (various colours)
green paint
green and yellow tissue paper
sequins/ jewels / ribbon for decoration (optional)
2 x chop sticks or wooden kebab skewers

First cut the tissue rolls, one with two openings either side for the mouth and one into a point for the tail. (Shown above) Paint green or red inside and out and put somewhere to dry. To make the eyes, nose, chin and teeth, cut the shapes out of card and attach with glue. You can then decorate the head with sequins, jewels, ribbon and other pretty bits!


The tail can also be decorated with card and anything else that you might want to add!

To make the body you will need a long rectangle piece of tissue paper (I have used green) and two smaller strips of another colour tissue paper, glue the two smaller strips onto the edges of the green piece.
 The body can then be glued onto the head and tail, finally attach your sticks, pierce the head and tail underneath and slide the sticks inside the tubes, attach with tape to hold in place, the sticks can then be used to control the puppet.
We had great fun making these at art club today and they all looked fantastic!


Tuesday, 3 January 2012

New Year, New Creations!

Hello and happy new year!
January in my eyes is a time to evaluate and to get new ideas into practice. Having attended several craft fairs over the christmas period, some of which were fairly unsuccessful, I have decided to branch out my creativity and try something new! I have been inspired firstly by my three wonderful children and secondly by a magazine passed onto me by my Mum entitled 'Craft Seller'. In it was instructions on how to make a patchwork quilt for a baby. Sewing has never been my strong point but nevertheless I decided to give it a try and make my two month old son a quilt for christmas! I was overwhelmed by all the beautiful material available online and the next day I had ordered fat quarters galore! I followed the instructions in the magazine and also got a bit of help from some tutorials on youtube and within a couple of days I had created a beautiful retro present that I'm hoping he will treasure! I felt very proud of myself. However that's not the end of the story! My eldest daughter then put in a request for a pink style quilt so I had great pleasure in selecting a load of girly fabrics for hers! I am in the process of making this one and having gained a bit of experience from the first attempt, it's going rather well! I couldn't leave out my other daughter who wants one with lots of yellow, her favourite colour! So I will be busy with hers next. I love the whole process that goes into designing and making a quilt, from the fabric selection to the layout of the squares and then watching it evolve into a beautiful cosy creation! I will be for sure adding a quilt or two to my etsy shop to see if they sell!

                                                             Blaise,s Finished Quilt

                                                               Sophia's Quilt in the making!

Tuesday, 6 December 2011

How To Make A Pair Of Beaded Earrings {Tutorial}

Hello, welcome to my first blog! I am going to show you how to make a pair of beaded earrings using a very simple technique. These earrings are popular sellers and you can experiment with using different styles, sizes and shaped beads to create different looks.
You will need:
Flat nose pliers
Rounded pliers
Snips
2 x 50mm earring pins
2 x Earring hooks
2 x 2mm silver beads
2 x 10-12mm glass beads
2 x 6mm silver filigree beads
2 x 4mm clear glass beads


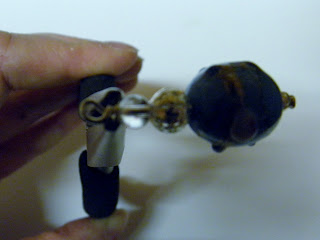
Start by threading your beads onto the silver pins. First thread the 2mm silver beads, next the big 10mm beads, then the silver filigree beads and finally the clear 4mm beads. You should have something that resembles the picture below, make sure that you have at least 20mm of the pins still showing at the top as you will need this to make your loop that attaches to the earring hook.


Using your round nose pliers, clasp the pin approx 2mm above the top bead, bend the pin 90 degrees as shown.


Take your pin wire over the top of the pliers to form a loop.

Remove the pliers from the loop and re-position them so that they are clasping the loop that you have just made. Twist the remaining wire as tightly as you can around itself a couple of times and snip off the excess wire as close to the top bead as possible.


Using the flat nose pliers squash in the bit that you have just cut so that there isn't a sharp bit pointing out.


Finally, with your flat nose pliers, prize open the loop on the earring hook findings and attach to the loop on your earrings, close the loop back up and hey presto you have a beautiful pair of earrings!